Showing posts with label How To. Show all posts

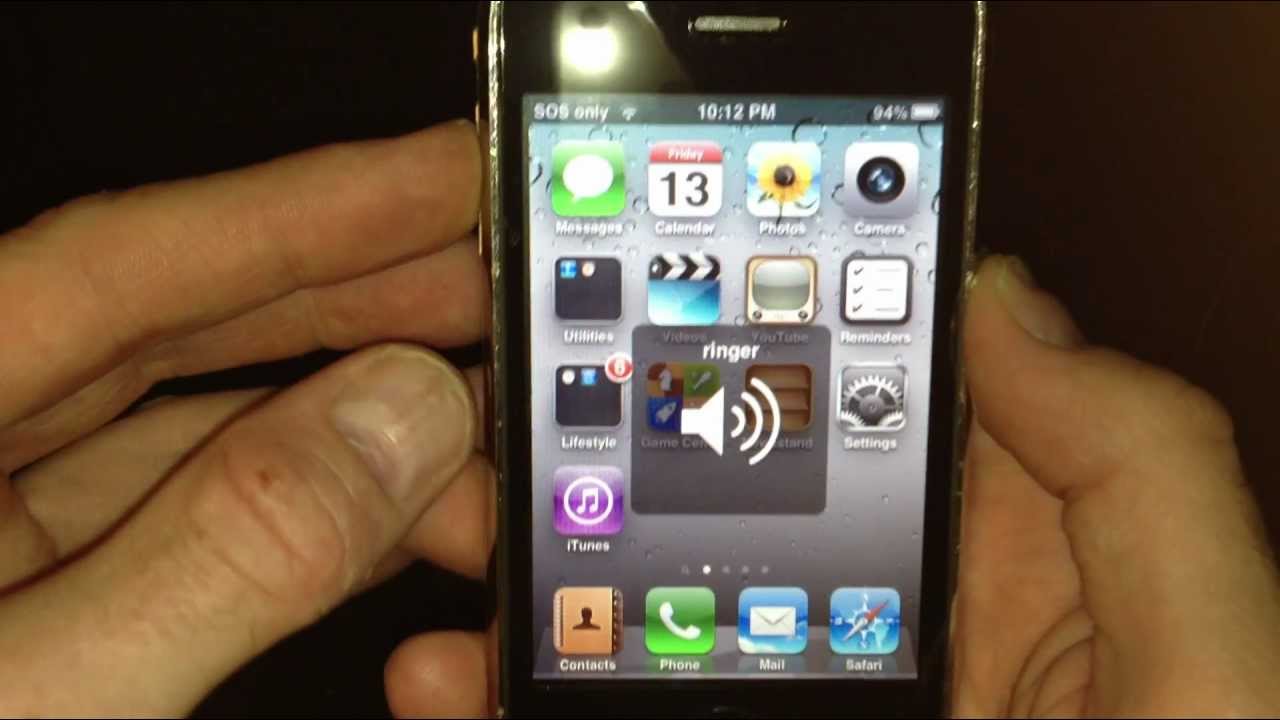
fix IPhone 3G and iphone 3Gs sound problems.

this is a software issue, so many peaple have the same issue and hardly any ones got the solution. here is what to do, for this to work you need to be jailbroken, go to cydia and download a program called IFILE. when you have downloaded this program open it and go to >SYSTEM >LIBRARY >LAUNCHDAEMONS, scroll down the list and find a file called, com.apple.iapd.plist, when you have found this file MAKE SURE it is the exact file. swipe across it and when you see delete press it to delete it. double press the home button and close ALL. apps in multi tasking. now reboot your devise. YOUR PROBLEM WILL BE OVER. I have solved my issue on my iphone 4 running 5.1.1 firmware

how to fix black screen (iphone 3g ,iphone 3gs,iphone 4,iphone 4s,iphone 5,iphone 5s ,iphone 6,iphone 6S)


How to fix your blank iPhone screen

Don’t panic! The blank screen on your iPhone 3G, 3GS, 4 iPhone 5s and 6 can be fixed, easily!
Fortunately, I worked out that you can fix this problem by resetting your phone. Here’s how:
Press and hold down the Sleep/Wake button and the Home button simultaneously for at least 10 seconds. The screen will clear out and then the Apple Logo will appear on the black background. When the logo appears it means that the reset is done.
Afterwards you’ll see your screen light up and you’ll be able to breath a sigh of relief!

How to factory reset an iPhone using the smartphone


Step 1: Prepare your iPhone for restoration
Connect your iPhone to your computer via USB and click the gray Back Up Now button when viewing the Summary tab for your given device in iTunes. Alternatively, follow our guide on how to use iCloud to back up the device you Apple’s remote servers. Although backing up your device is not necessary, doing so will store your photos, apps, contacts, settings, and other data so you can automatically restore other iOS devices from the backup down the line.
Step 1: Access the Reset menu
Tap the main Settings icon when viewing the homescreen, select the General option on the resulting menu and tap the Reset button at the bottom of the next page.
iPhone Reset
Step 2: Reset your iPhone  
Tap the blue Erase All Content and Settings option second from the top, followed by the red Erase iPhone option in the resulting pop-up window to confirm the decision.
iPhone Erase All Content and Settings
Step 3: Ensure the phone was restored
Once the restoration process is complete — a process that may take up to several minutes — check to ensure the phone has been restored to the original factory settings. If done correctly, you’ll once again be presented with the iOS Setup Assistant upon startup, from which you can then restore your phone from backup or continue the process as if setting up a new phone entirely.
iPhone Hello


How to factory reset an iPhone using iTunes


Step 1: Prepare your iPhone for restoration
Click the iTunes menu located on the left side of the main iTunes toolbar, select Check for Updates from the resulting drop-down menu and ensure you have the latest version of iTunes. If not, download and install the latest version thereof. Afterward, connect your iPhone to your computer via USB and click the gray Back Up Now button when viewing the Summary tab for your given device in iTunes. Alternatively, follow our guide on how to use iCloud to back up the device you Apple’s remote servers. Although backing up your device is not necessary, doing so will store your photos, apps, contacts, settings, and other data so you can automatically restore other iOS devices from the backup down the line.
Check for Updates for iPhone
Step 2: Restore your iPhone
Once the backup is complete, click the gray Restore iPhone button when viewing the Summary tab for your given device in iTunes. Click the Restore button in the resulting pop-up window to confirm your decision, and if prompted, click the Agree button to agree to the software license agreement and begin downloading the necessary iOS software file before restoring.
Restore iPhone
Step 3: Ensure the phone was restored
 Once the restoration process is complete — a process that may take up to several minutes — check to ensure the phone has been restored to the original factory settings. If done correctly, you’ll once again be presented with the iOS Setup Assistant upon startup, from which you can then restore your phone from backup or continue the process as if setting up a new phone entirely. It’s like it just came off the assembly line at Foxconn all over again.
Set up iPhone as New Phone

How to Share Your iPhone Internet Connection With Your PC (wifi,Bluetooth,USB)


Create a Hotspot to Tether Any Device With Wi-Fi

If you have a Mac, scroll down — you can do this more easily. But you can connect any type of device to the Internet through your iPhone. This means Windows laptops, Chromebooks, Android tablets, iPads, portable gaming consoles, and more — anything at all that can connect to Wi-Fi.
To get started, open your iPhone’s Settings screen and tap the Personal Hotspot option between Cellular and Carrier near the top of the screen. If you don’t see the option, contact your carrier — it’s possible you have to pay them extra before you can see and use it.
Enable the Personal Hotspot feature and your iPhone’s top bar will turn blue, indicating that the personal hotspot is running in the background and draining your battery.
Your iPhone will now appear as a nearby wireless network. On any device with a Wi-Fi connection, open the list of networks and choose your device in the list — it’ll be named something like “[Name]’s iPhone.” Select it in the list and you’ll be asked for a passphrase. Enter the passphrase displayed on the Personal Hotspot screen on your iPhone. Your device will connect.
When you’re done, pick up your iPhone and disable the Personal Hotspot feature to save battery life. This is easy — your iPhone’s top bar will be blue as long as the Personal Hotspot feature is enabled. Tap it and you’ll be taken directly to the Personal Hotspot screen, where you can disable it.

Easy Wi-Fi Tethering on a Mac

Mac OS X Yosemite makes these things work well together. Click the Wi-Fi icon on the menu bar, and you’ll see your nearby iPhone appear under “Personal Hotspot.” Click it, and your Mac will automatically connect to the iPhone, enabling the Wi-Fi hotspot feature and allowing you to connect directly to the Internet.
This is convenient because it allows you to quickly connect to your iPhone from your Mac without leaving the personal hotspot feature enabled all the time. You can do this entirely from your Mac without picking up your iPhone and tapping anything. It’s only enabled when you connect to it. This saves battery life.

USB Tethering on a Mac

You can also connect your iPhone to your computer via a USB cable — not a bad idea, as the iPhone can draw power from your Mac and its battery won’t be run down by the tethering.
Go into your iPhone’s Setting screen, tap Hotspot, and Personal Hotspot near the top of the list, and enable Personal Hotspot. You can then click the WI-Fi icon on the menu bar and select Open Network Preferences. You’ll see that your Mac is tethered to the iPhone using the “iPhone USB” connection. If you don’t see it in the list, click the “+” button and add the iPhone USB network interface.

USB Tethering on Windows

USB tethering can al;so function with a Windows PC. You’ll need the latest version of iTunes installed on your Windows PC to do this, as it includes the appropriate drivers. Enable Personal Hotspot on your iPhone and then connect it ot the Windows PC using a USB cable. Your Windows PC will be able to use the iPhone as a network connection, just as a Mac could.
This should automatically configure itself if you plug your iPhone in with Personal Hotspot enabled. You’ll see the network connection appear as an “Apple Mobile Device Ethernet” connection.


iPhones also support Bluetooth tethering. Pair your iPhone with a computer or other device over Bluetooth to share the Internet connection using Bluetooth. Wi-Fi tethering will be easier to set up and faster. However, Bluetooth tethering could potentially drain your iPhone’s battery more slowly, saving some battery life.

How to Put Music on iPhone 6/6s (Plus)


Solution 1: How to Put Music on iPhone 6/6s (Plus) with iTunes

  • Plug your iPhone 6 (Plus) into your computer with a USB cord. Your computer will automatically recognize your iPhone and will launch iTunes.
  • Click on the iPhone logo under "Devices" on the left-hand side of the screen in iTunes.
  • Click on the "Music" tab.
  • Choose "Entire Music Library" to put all of your music from iTunes to your iPhone 6 (Plus); Choose "Selected Playlists, Artists, and Genres" to add certain artists or playlists to your iPhone 6 (Plus).
  • Click on the "Sync" button.
Note: iTunes could be your first choice to put music to your iPhone 6 (Plus), however, it may erase your existing music while syncing. And it won't support transferring music from your old iPhone to your new iPhone. With AnyTrans, all could be completed within few clicks!
How to Put Music on iPhone 6/6s (Plus) with iTunes How to Put Music on iPhone 6/6s (Plus) with iTunes

Solution 2: How to Put Music on iPhone 6/6s (Plus) without iTunes

Another highly recommend option to put music on your iPhone 6 (Plus) is to use a third party app - AnyTrans. AnyTrans could be a great manager to manage your iPhone 6 (Plus) music and other types of contents. Why?
- Allows you to transfer music from computer to iPhone 6 (Plus) without erasing the existed iOS data. And it supports all the iPhone modes.
- Helps you upgrade to new iPhone 6 (Plus) with ease - you can sync almost all the personal info and media data from your old iPhone to the new one, such as, music, videos, photos, apps, contacts etc.
- Provides you great iCloud backup management experience which gives you the access to iCloud, and even download the specific items to the computer, including photos, contacts, messages, notes, bookmarks etc.
1. Go to download & install AnyTrans, and plug your iPhone 6/6s into your computer.
Put Music on iPhone 6/6s without iTunes – Step 1 Put Music on iPhone 6/6s without iTunes – Step 1
2. Launch AnyTrans, and on the homepage of AnyTrans, click "Audio" button, and then choose "Music".
Add Music to iPhone 6/6s without iTunes – Step 2 Add Music to iPhone 6/6s without iTunes – Step 2
3. Click the add button, and browse the music on your computer, then click open to start transferring.
How to Put Music on iPhone 6/6s without iTunes – Step 3 How to Put Music on iPhone 6/6s without iTunes – Step 3

How to use Find my iPhone

How to use Find my iPhone


Step 1: Check the requirements. Although optimized for the iPhone 5, Find my iPhone is available on all devices equipped with iOS 5 or later. The utility is completely free and compatible beginning with the iPhone 3GS, third-generation iPod touch, the iPad, and all the latest versions thereof. A valid iCloud account is also required and devices that lack network coverage must be connected to a registered Wi-Fi network to be located.
Step 2: Download and install the app: Tap the blue App Store icon located on your iOS device, search “Find my iPhone” within the Search panel and select application from the list of results. Afterward, tap the gray Free button in the top-right corner and followed by the resulting green Install button to download and install the app. Alternatively, download the app from iTunes and sync it with your iOS device.
Download Find My Phone
Step 3: Activate Find my iPhone. Once installed, tap the main Settings icon, followed the iCloud option near the center of the Settings menu. Enter your Apple ID in the resulting pop-up window if prompted, or tap Get a free Apple ID and follow the onscreen instructions to set up your free iCloud account. Swipe to the bottom of the menu once signed in, toggle the on-off switch to the right of Find my iPhone and tap the gray Allow button from the resulting pop-up window. Repeat the process using the same iCloud account information for any iOS device you wish to view.
Activate Find My Phone
Step 4: Lose your iOS device. Obviously this doesn’t come highly recommended, but finding your iOS device once lost is likely the reason you chose to use the app in the first place.
Step 5: Locate your iOS device. Once lost, you can either use another iOS device or your iCloud account via the Web to locate your lost or stolen device. Keep in mind it’s not possible to locate the device if didn’t activate the Find my iPhone function before losing your device.
Using another iOS device: Tap the Find my iPhone icon from the home screen (the icon resembles a old-school radar display), enter your iCloud login credentials in the appropriate fields and tap the gray Sign In button located at the bottom of the display. Once logged in, select the lost or stolen device from a the list of devices setup with Find my iPhone and view the device’s location.
Additional options for remotely wiping the phone and forcing it to play a sound — accessible by tapping the device’s pin followed by the blue arrow — are also available, along with a intuitive Lost Mode that provides options for locking the device with a 4-digit passcode and displaying a contact phone number directly on the lock screen.
Locate Find My Phone
Using your iCloud account on the Web: Open your favorite browser and navigate to the iCloud homepage before signing in with your Apple ID and password. Afterword, click the large Find my iPhone icon, enter your iCloud password once more and select the lost or stolen device from a the list of devices setup with Find my iPhone.
Additional options for remotely wiping the phone and forcing it to play a sound should appear in the upper-right corner, along with a intuitive Lost Mode button that provides options for locking the device with a 4-digit passcode and displaying a contact phone number directly on the lock screen.
Find My Phone Computer
Step 6: Take action. Once you locate your iPhone or iOS device, use one of Find my iPhone’s built-in functions to help recover the device. Tap the gray Play Sound button featuring the speaker to force the your phone to play a high-pitched ping continuously for two minutes or tap the gray Erase iPhone button followed by the Erase confirmation to completely wipe your device of all content and user settings. If running iOS 6, tap the middle Lost Mode button, enter a phone number where you can be reached and type a message to be shown on your phone. Click the brown Done button in the upper-right corner when finished entering your message in the text field.
Find My Phone Use
There’s no guarantee the ringing, erasing or messaging will help you get your device back — regardless if you know it’s precise whereabouts. Rather than confront the potential thief yourself, it may be wise to contact your service provider and the police, informing them of the situation and your intentions to recover the device. You never know when things might escalate like they did in San Francisco.

How to Fix iPhone 6 App Issues

How to Fix iPhone 6 App Issues


We’ve been hearing a lot of complaints about applications crashing and freezing in iOS 8. iPhone 6 users, in particular, have been extremely vocal. Apple’s not going to be fixing these issues and it’s going to be up to third-party developers to take care of any random problems. This means that fixes, permanent ones, could take awhile. Fortunately, there are a few things that iPhone 6 users can try to make the app experience far more stable.
First, make sure applications on the iPhone 6 are updated. App updates with support for iOS 8 have been trickling out since launch. Many iPhone users are horrible about updating apps and that’s a habit that should be broken right now.
iPhone 6 users who are forgetful or lazy will want to turn on automatic App Store updates because it will keep apps automatically updated and ensure that they are always on the latest version with the latest bug fixes.

How to Fix iPhone 6 Battery Life Problems


One issue that typically surfaces after every iOS update is battery drain. iPhone and iPad owners consistently complain about the negative impact that iOS updates have on their battery life and iOS 8 unfortunately has not escaped their wrath. Even iPhone 6 users are complaining about bad battery life.
While we’ve heard a number of complaints about iPhone battery life after the iOS 8 update, iPhone 6 users should not expect Apple to deliver a permanent fix inside iOS 8.1 or any other iOS 8 update. The complaints simply aren’t widespread enough. There’s also a good chance that the battery drain on the iPhone 6 isn’t being caused by iOS 8.
Fortunately, there are quite a few things that iPhone 6 owners can try should the device start experiencing heavy battery drain after installing the iOS 8.0.2 update or if iOS 8.0 itself is presenting problems.
While there are a ton of things that people recommend, we think there are several key fixes that iPhone 6 users should try. These fixes range from small settings tweaks to changes in daily overall use. All of them have the potential to fix bad iOS 8 battery life and we highly recommend looking at them before performing a hard reset on the iPhone 6.

Find Apps Using Your Battery Life

The iOS 8 update adds a new feature that shows you what apps are using most of your battery life. Very often bad iPhone battery life is linked to a broken or misbehaving app. This new iOS 8 feature lets you see what apps use most of your battery life and even find usage and background activity. A chat app like Google Hangouts can use a lot of battery life, even if you aren’t in it all day.
Find apps using your iPhone battery life in iOS 8.
To see what apps are using your iOS 8 battery life, go to Settings -> General -> Usage -> Battery Usage. On this screen you can see what apps use your battery the most in the last 24 hours and in the last 7 days.
You may need to uninstall an app to get better iOS 8 battery life, but the solution may be to avoid using battery hogging apps during the day — like games and watching media.

Turn Off Background App Refresh

One of the first things you can try to get better iOS 8 battery life is turning off Background App Refresh. This feature lets apps connect and update in the background, so they can show updates as soon as you open them, but this also uses more battery life. Apple shares on the iOS 8 Background App refresh screen, “Turning off apps may help preserve battery life.”
Turn off iOS 8 Background App Refresh for better battery life.
Go to Settings -> General -> Background App Refresh -> Turn it all off or off for individual apps.
You can turn Background App Refresh off for all apps or only for certain apps. If you see an app listed with background activity at the top, you may want to simply turn off that app.

Turn Off Push Email

If you use push email to get messages from work as soon as they arrive, you are slowly draining your battery life with every pushed message. If you don’t need email delivered instantly you can turn off push email and get better battery life.
Stop using Push email for better iOS 8 battery life.
Go to Settings -> Mail , Contacts, Calendars -> Fetch New Data – > Choose the setting for each email account. 
The best option we’ve found is to push the time between checking for new messages to Fetch every 15-30 minutes instead of constantly looking.

Turn Screen Brightness Down

The iOS 8 update didn’t crank up your screen brightness, but this is one of the easiest ways to get better iOS 8 battery life.
Swipe up from the bottom of your home screen to open Control Center. Slide the brightness indicator to the left to turn the brightness down.
Use screen brightness the right way for good iOS 8 battery life.
You can go to Settings -> Display & Brightness -> Auto-Brightness -> Off. Normally you can leave this on, but if you need to make sure the battery lasts all day while on a trip turning it off and leaving brightness at a minimum will help you get better battery life.

Turn Off 4G LTE

Using the faster 4G LTE network can use more data, and if you are on the edge of coverage this may be the quickest fix for bad iOS 8 battery life. Try turning this off to see if it improves. If it does you may need to leave this off when you are in this area.
Turn off LTE when you are in poor coverage.
Go to Settings -> Cellular -> Enable LTE -> Off. This is not a setting I would leave off all the time, because it makes anything related to the Internet take longer, but in some cases it is a quick fix.

Airplane Mode

This is a dramatic step to get better iOS 8 battery life, but if you only need to play games or read a book, and you don’t want the iPhone to die, you can turn on Airplane mode.
Airplane mode limits use, but deliver better battery life.
Pull the Control Center up from the bottom of your home screen and tap on the small plane icon.
This turns off WiFi and Cellular radios completely, so you can’t do as much with the iPhone or iPad, but the battery lasts longer for offline activities like taking photos and playing games.

Restart the iPhone

If you have not restarted the iPhone since you installed the iOS 8 update or for a few days even, go ahead and turn the iPhone off then back on.
Sometimes a simple restart is enough to stop whatever was causing bad iOS 8 battery life and reset things so the battery will last all day.
Hold the power button down until the screen changes, then slide to the right to power off. After a minute or two hold the power button to turn it back on.

Reset All Settings

When you check the iOS 8 battery usage in our first tip you may see usage and standby listed as the same. If this is the case you need to take more drastic measures because something is wrong with your iPhone. The first thing to try is Reset All Settings. This does not delete your data or wipe the phone, only the settings. If something is messed up this may fix horrible iOS 8 battery life in about 5 minutes.
Reset all settings to fix odd iOS 8 bugs that can cause bad battery life.
Go to Settings -> General -> Reset -> Reset All Settings. If prompted, enter your PIN or pass code. Wait for the device to restart and then use your device like normal. You may need to reconnect to WiFi, Bluetooth and change some other settings, but your apps, photos and accounts are still all there.

Restore the iOS 8 Update

If none of these iOS 8 battery life tips fix problems after your iOS 8 update you may need to backup the iPhone and restore from scratch. Perhaps something went wrong during your iOS 8 update, or there is just a bug from the upgrade, but this process will wipe it clean and install iOS 8 from scratch. This can solve a lot of problems.
You’ll need to back up the iPhone or iPad because this will delete all of your photos, apps and data from the device. You can restore from a backup, but there is a chance that will bring some problems back so the best bet is to set this up like a new iPhone.
  1. Plug in and backup to the computer or to iCloud
  2. Turn off Find My iPhone – Settings -> iCloud -> Find my iPhone -> Off
  3. in iTunes Click Restore
  4. Follow the prompts and the iPhone will reinstall iOS 8 from scratch.
  5. When it completes click Restore from Backup to put your information back on the iPhone or Choose to set up as a new iPhone.
This process takes 15 to 30 minutes depending on download times and if you need to backup or restore.
fix Bluetooth problems in iOS 8

  • Turn off Bluetooth and Reboot

The first thing to try is to turn off your Bluetooth and restart your iPhone or iPad:
  • Turn off Bluetooth from Control Center, or by going to Settings > Bluetooth and turning off the switch.
  • Reboot your iPhone by holding the Home button and the Power button until you see the Apple logo
  • Now enable Bluetooth again from Control Center or Settings > Bluetooth
  • Forget Device


  • Open Settings and go to Bluetooth.
  • Tap on the “i” icon against the device name you’re having problems connecting.
  • Tap on the “Forget This Device” button and confirm your action.
  • Now pair your iPhone or iPad with the device again, and see if the issue has been solved.
  • Reset Network Settings


  • Open Settings and navigate to General > Reset
  • Tap on Reset Network Settings
  • You’ll be required to enter your passcode, if you have one
  • Confirm your action in the popup


  • Restore and Setup as new iPhone


How to recognize any song on your iPhone with Siri


You Can Now Use Siri to Identify and Rate Songs


To identify a track with Siri:
  • Play any song on a device or speakers, if it’s not already playing.
  • Hold the home button on your iOS device to invoke Siri and ask, “What song is playing?”
  • Siri will respond by saying: “Let me listen.”, “Listening” or something similar, and take a few seconds to recognize the track and display the results.
  • You can of course do this by invoking Siri without pressing the home button.

fix wifi problems with ios 8


Disable Wi-Fi Networking Services
Many users have reported that they’ve solved their issues by disabling Wi-Fi Networking under Settings > Privacy > Location Services > System Services. This only relates to your location being used for Wi-Fi Networking, so it doesn’t disable Wi-Fi entirely.

Reset Network Settings
Most networking related issues I’ve experienced have been fixed after resetting network settings. Resetting these settings flushes caches and clears DHCP settings and other networking related info. To reset network settings, open the Settings app and navigate to Settings > General > Reset and tap on Reset Network Settings.

Set Custom DNS
Often times, if your ISPs DNS servers are having problems, you can switch to Google DNS or OpenDNS. You can follow the instructions in the post linked below to change your DNS settings.


Restore and Setup as new iPhone
If none of these tips fix your issues, the last resort is to restore your iPhone or iPad via iTunes, and set it up as a new device. This way, you start afresh, and get rid of possibly problematic customisations and settings on your device. Follow the instructions in the post linked below to do a clean restore to the latest version of iOS via iTunes.

How To Jailbreak, iOS Version


Evasi0n Utility is free jailbreak tool for jailbreak iPhone, iPad and iPod Touch. After jb, you can see installed Cydia Store on your iDevice. Evasi0n tool is free utility and works perfect on Windows and Mac OS X. It's free for all, who want make jb on yours gadgets. Pangu Jailbreak Utility is also free jailbreak utility.

What Device and iOS Version Can Evasi0n Jailbreak Be Used With?

          iPhone 6 Plus: not yet 

          iPhone 6: not yet

iPhone 5S:
iOS 7.1.2, iOS 7.1,1, iOS 7.1, iOS 7.0.6, iOS 7.0.5, iOS 7.0.4, iOS 7.0.3, IOS 7.0.2, iOS 7.0.1, IOS 7.0
iPhone 5c:
iOS 7.1.2, iOS 7.1,1, iOS 7.1, iOS 7.0.6, iOS 7.0.5, iOS 7.0.4, iOS 7.0.3, IOS 7.0.2, iOS 7.0.1, IOS 7.0
iPhone 5:
iOS 7.1.2, iOS 7.1,1, iOS 7.1, iOS 7.0.6, iOS 7.0.5, iOS 7.0.4, iOS 7.0.3, IOS 7.0.2, iOS 7.0.1, IOS 7.0, iOS 6.1.2, iOS 6.1, iOS 6.0.1, iOS 6.0
iPhone 4S:
iOS 7.1.2, iOS 7.1,1, iOS 7.1, iOS 7.0.6, iOS 7.0.5, iOS 7.0.4, iOS 7.0.3, IOS 7.0.2, iOS 7.0.1, IOS 7.0, iOS 6.1.2, iOS 6.1.1, iOS 6.1, iOS 6.0.1, iOS 6.0
iPhone 4:
iOS 7.0.6, iOS 7.0.5, iOS 7.0.4, iOS 7.0.3, IOS 7.0.2, iOS 7.0.1, IOS 7.0, iOS 6.1.2, iOS 6.1, iOS 6.0.1, iOS 6.0
iPhone 3GS:
iOS 6.1.2, iOS 6.1, iOS 6.0.1, iOS 6.0
iPhone 3G: Not supported

iPad Air (5):
iOS 7.1.2, iOS 7.1,1, iOS 7.1, iOS 7.0.6, iOS 7.0.5, iOS 7.0.4, iOS 7.0.3, IOS 7.0.2, iOS 7.0.1, IOS 7.0
iPad Mini 2:
iOS 7.1.2, iOS 7.1,1, iOS 7.1, iOS 7.0.6, iOS 7.0.5, iOS 7.0.4, iOS 7.0.3, IOS 7.0.2, iOS 7.0.1, IOS 7.0
iPad Mini:
iOS 7.1.2, iOS 7.1,1, iOS 7.1, iOS 7.0.6, iOS 7.0.5, iOS 7.0.4, iOS 7.0.3, IOS 7.0.2, iOS 7.0.1, IOS 7.0, iOS 6.1.2, iOS 6.1, iOS 6.0.1, iOS 6.0
iPad 4:
iOS 7.1.2, iOS 7.1,1, iOS 7.1, iOS 7.0.6, iOS 7.0.5, iOS 7.0.4, iOS 7.0.3, IOS 7.0.2, iOS 7.0.1, IOS 7.0, iOS 6.1.2, iOS 6.1, iOS 6.0.1, iOS 6.0
iPad 3:
iOS 7.1.2, iOS 7.1,1, iOS 7.1, iOS 7.0.6, iOS 7.0.5, iOS 7.0.4, iOS 7.0.3, IOS 7.0.2, iOS 7.0.1, IOS 7.0, iOS 6.1.2, iOS 6.1, iOS 6.0.1, iOS 6.0
iPad 2:
iOS 7.1.2, iOS 7.1,1, iOS 7.1, iOS 7.0.6, iOS 7.0.5, iOS 7.0.4, iOS 7.0.3, IOS 7.0.2, iOS 7.0.1, IOS 7.0, iOS 6.1.2, iOS 6.1, iOS 6.0.1, iOS 6.0
iPad 1: Not supported

iPod Touch 5G:
iOS 7.1.2, iOS 7.1,1, iOS 7.1, iOS 7.0.6, iOS 7.0.5, iOS 7.0.4, iOS 7.0.3, IOS 7.0.2, iOS 7.0.1, IOS 7.0, iOS 6.1.2, iOS 6.1, iOS 6.0.1, iOS 6.0
iPod Touch 4G: iOS 6.1.2, iOS 6.1, iOS 6.0.1, iOS 6.0
iPod Touch 3G: Not Supported
iPod Touch 2G: Not Supported

This list will be updated as new versions of Evasi0n Jailbreak or Pangu Jailbreak are released.

Evasi0n Download links [Here]
Pangu Download links [Here] 

iPhone 5 Home Button Replacement

How To: Replace the Home Button in the iPhone 5


iPhone 5 Display Assembly Replacement

How To: Replace the Display Assembly (LCD, Screen, Digitizer) on the iphone 5


iPhone 5 Battery Replacement

How To: Replace the Battery in an iPhone 5


tutorial : iPhone Home Button Not Working? – How to Fix It?

iPhone home button not working? Well, don’t worry. Quite a lot of people have the very same problem. Something seems to go wrong and both the single and the double-click functionality of the home button seems to be totally lost. When this happens first, one is easily prompted to press harder. Sometimes people just thing it’s the hardware problem and that the home button is gone for good. This may not be the case most of the times.
The problem might occur because of two reasons – one, the software may be faulty and two – this is the worst case scenario – the hardware might be faulty. If it is the latter, you definitely need to go to the Apple Center and get a new iPhone. If the problem is with the software – which it mostly is – one needs to try out the following methods.
A problem with the software usually is set right when you do a restoration of the iPhone OS. You can either do a restore from the backup, or do a complete restore in case you have not much data to worry about. Restoring from the backup or from scratch lets you reconfigure all your software settings so that whatever it is that was bugging the home button on the iPhone would go away.
However, some people have reported that both the types of restore does not bring the intended results. In that case, you’ll need to follow some other method. Here’s one more method which seems to work in favor of some iPhones. You could try it too.
  1. Open any application on the iPhone
  2. Press and hold the Power button till the ‘Slide to Shutdown’ screen appears.
  3. Now release the Power button and gently hold the Home button.
  4. In all probability, your Home button would start functioning normally again!
In the case that it fails to do so even after all this, you’ll definitely need to check out the hardware part. If you have just recently bought the device, then you get a replacement warranty so you can make use of that to get a new device quickly.
Update
In case your iPhone home button has become less sensitive or is even broken, iOS 5 has come up with the great solution named ‘AssistiveTouch’ feature. Assistive Touch is one of the accessibility features in iOS 5 that can be served as a workaround, if your iPhone home button is broken.
How to Enable Assistive Touch to Access Home Button from Screen in iOS 5:
Got to Settings -> General -> Accessibility. Scroll down to bottom and tap on “AssistiveTouch” option. Set it ON to activate the option.

After setting AssistiveTouch to ON, you will see a transparent round button at the bottom right of the screen. Tap on that round button to bring the touch menu.

You will find the Home button option that works just like as the physical home button.

Hope, latest iOS 5 AssistiveTouch feature will bring the intended results.

tutorial : How to Install Installous on iOS 5.0.1 for iPhone, iPad and iPod Touch?

iOS 5.0.1 Untethered jailbreak has already been released by iPhone Dev-Team. After jailbreaking your iDevice, Installous is one of the must have Cydia apps  you should install. Updated version Installous 4.4.2 is now compatible with iOS 5/5.0.1.
Installous is used to install cracked iPhone apps on your iDevices. Following is the step by step guideline about how to install Installous 4.4.2 on iPhone, iPad or iPod Touch running iOS 5/5.0.1 and Older Versions of iOS.
Step 1: First of all your iDevice should be jailbroken.
Step 2: Now launch Cydia on your jailbroken iDevice.Step 3: Tap on “Manage” tab at the bottom, and then tap on the “Sources”.
Step 4: Now tap on the “Edit” button at the top right corner and then on “Add” button on the top left corner of the screen.Step 5: Now add http://cydia.hackulo.us repository in field and tap on “Add Source” button.
Step 6: Now Cydia will update its repo list. Once it is done, tap on the Search tab at the bottom and type Installous in the search field and select the Installous 4 from the search result.
Step 7: Now tap on the “Install” button and then on the “Confirm” button to install Installous.
Step 8: At last tap on the Restart SpringBoard to reboot your device and you are done.
That’s all! Installous 4.4.2 is successfully installed to enjoy any app for free from the App Store.