Showing posts with label Fix. Show all posts

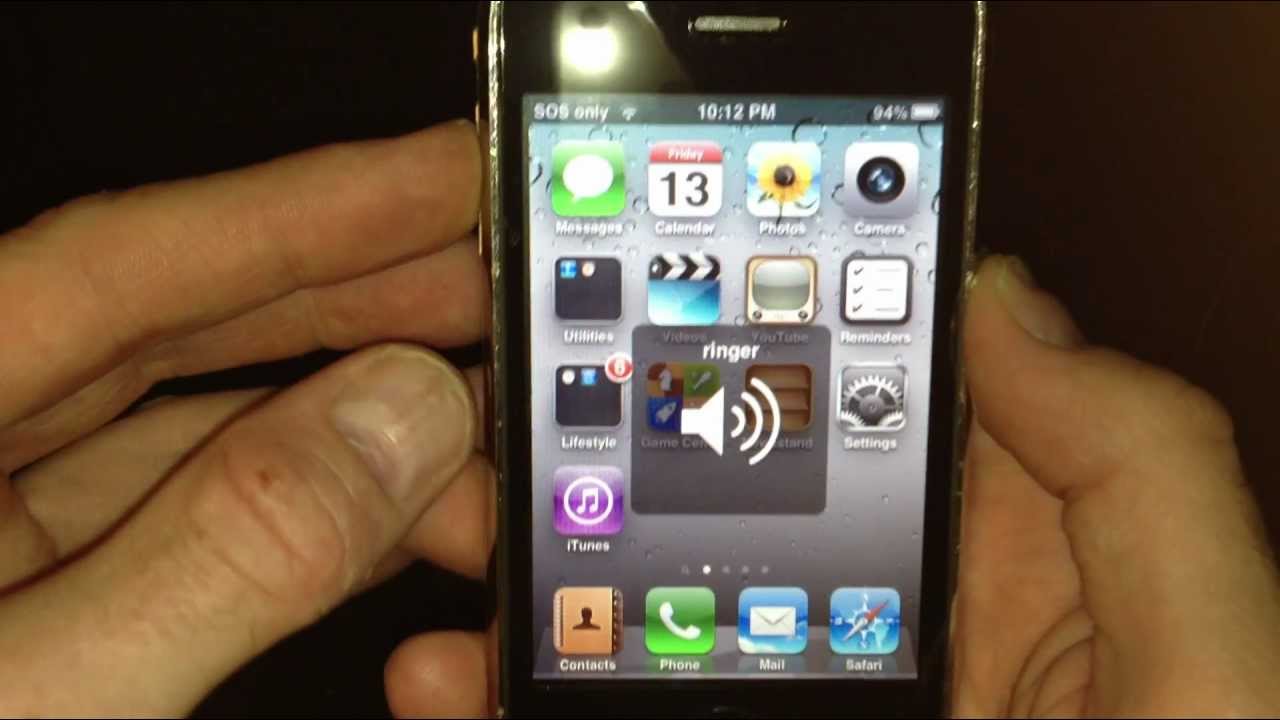
fix IPhone 3G and iphone 3Gs sound problems.

this is a software issue, so many peaple have the same issue and hardly any ones got the solution. here is what to do, for this to work you need to be jailbroken, go to cydia and download a program called IFILE. when you have downloaded this program open it and go to >SYSTEM >LIBRARY >LAUNCHDAEMONS, scroll down the list and find a file called, com.apple.iapd.plist, when you have found this file MAKE SURE it is the exact file. swipe across it and when you see delete press it to delete it. double press the home button and close ALL. apps in multi tasking. now reboot your devise. YOUR PROBLEM WILL BE OVER. I have solved my issue on my iphone 4 running 5.1.1 firmware

how to fix black screen (iphone 3g ,iphone 3gs,iphone 4,iphone 4s,iphone 5,iphone 5s ,iphone 6,iphone 6S)


How to fix your blank iPhone screen

Don’t panic! The blank screen on your iPhone 3G, 3GS, 4 iPhone 5s and 6 can be fixed, easily!
Fortunately, I worked out that you can fix this problem by resetting your phone. Here’s how:
Press and hold down the Sleep/Wake button and the Home button simultaneously for at least 10 seconds. The screen will clear out and then the Apple Logo will appear on the black background. When the logo appears it means that the reset is done.
Afterwards you’ll see your screen light up and you’ll be able to breath a sigh of relief!

How to Fix iPhone 6 App Issues

How to Fix iPhone 6 App Issues


We’ve been hearing a lot of complaints about applications crashing and freezing in iOS 8. iPhone 6 users, in particular, have been extremely vocal. Apple’s not going to be fixing these issues and it’s going to be up to third-party developers to take care of any random problems. This means that fixes, permanent ones, could take awhile. Fortunately, there are a few things that iPhone 6 users can try to make the app experience far more stable.
First, make sure applications on the iPhone 6 are updated. App updates with support for iOS 8 have been trickling out since launch. Many iPhone users are horrible about updating apps and that’s a habit that should be broken right now.
iPhone 6 users who are forgetful or lazy will want to turn on automatic App Store updates because it will keep apps automatically updated and ensure that they are always on the latest version with the latest bug fixes.

How to Fix iPhone 6 Battery Life Problems


One issue that typically surfaces after every iOS update is battery drain. iPhone and iPad owners consistently complain about the negative impact that iOS updates have on their battery life and iOS 8 unfortunately has not escaped their wrath. Even iPhone 6 users are complaining about bad battery life.
While we’ve heard a number of complaints about iPhone battery life after the iOS 8 update, iPhone 6 users should not expect Apple to deliver a permanent fix inside iOS 8.1 or any other iOS 8 update. The complaints simply aren’t widespread enough. There’s also a good chance that the battery drain on the iPhone 6 isn’t being caused by iOS 8.
Fortunately, there are quite a few things that iPhone 6 owners can try should the device start experiencing heavy battery drain after installing the iOS 8.0.2 update or if iOS 8.0 itself is presenting problems.
While there are a ton of things that people recommend, we think there are several key fixes that iPhone 6 users should try. These fixes range from small settings tweaks to changes in daily overall use. All of them have the potential to fix bad iOS 8 battery life and we highly recommend looking at them before performing a hard reset on the iPhone 6.

Find Apps Using Your Battery Life

The iOS 8 update adds a new feature that shows you what apps are using most of your battery life. Very often bad iPhone battery life is linked to a broken or misbehaving app. This new iOS 8 feature lets you see what apps use most of your battery life and even find usage and background activity. A chat app like Google Hangouts can use a lot of battery life, even if you aren’t in it all day.
Find apps using your iPhone battery life in iOS 8.
To see what apps are using your iOS 8 battery life, go to Settings -> General -> Usage -> Battery Usage. On this screen you can see what apps use your battery the most in the last 24 hours and in the last 7 days.
You may need to uninstall an app to get better iOS 8 battery life, but the solution may be to avoid using battery hogging apps during the day — like games and watching media.

Turn Off Background App Refresh

One of the first things you can try to get better iOS 8 battery life is turning off Background App Refresh. This feature lets apps connect and update in the background, so they can show updates as soon as you open them, but this also uses more battery life. Apple shares on the iOS 8 Background App refresh screen, “Turning off apps may help preserve battery life.”
Turn off iOS 8 Background App Refresh for better battery life.
Go to Settings -> General -> Background App Refresh -> Turn it all off or off for individual apps.
You can turn Background App Refresh off for all apps or only for certain apps. If you see an app listed with background activity at the top, you may want to simply turn off that app.

Turn Off Push Email

If you use push email to get messages from work as soon as they arrive, you are slowly draining your battery life with every pushed message. If you don’t need email delivered instantly you can turn off push email and get better battery life.
Stop using Push email for better iOS 8 battery life.
Go to Settings -> Mail , Contacts, Calendars -> Fetch New Data – > Choose the setting for each email account. 
The best option we’ve found is to push the time between checking for new messages to Fetch every 15-30 minutes instead of constantly looking.

Turn Screen Brightness Down

The iOS 8 update didn’t crank up your screen brightness, but this is one of the easiest ways to get better iOS 8 battery life.
Swipe up from the bottom of your home screen to open Control Center. Slide the brightness indicator to the left to turn the brightness down.
Use screen brightness the right way for good iOS 8 battery life.
You can go to Settings -> Display & Brightness -> Auto-Brightness -> Off. Normally you can leave this on, but if you need to make sure the battery lasts all day while on a trip turning it off and leaving brightness at a minimum will help you get better battery life.

Turn Off 4G LTE

Using the faster 4G LTE network can use more data, and if you are on the edge of coverage this may be the quickest fix for bad iOS 8 battery life. Try turning this off to see if it improves. If it does you may need to leave this off when you are in this area.
Turn off LTE when you are in poor coverage.
Go to Settings -> Cellular -> Enable LTE -> Off. This is not a setting I would leave off all the time, because it makes anything related to the Internet take longer, but in some cases it is a quick fix.

Airplane Mode

This is a dramatic step to get better iOS 8 battery life, but if you only need to play games or read a book, and you don’t want the iPhone to die, you can turn on Airplane mode.
Airplane mode limits use, but deliver better battery life.
Pull the Control Center up from the bottom of your home screen and tap on the small plane icon.
This turns off WiFi and Cellular radios completely, so you can’t do as much with the iPhone or iPad, but the battery lasts longer for offline activities like taking photos and playing games.

Restart the iPhone

If you have not restarted the iPhone since you installed the iOS 8 update or for a few days even, go ahead and turn the iPhone off then back on.
Sometimes a simple restart is enough to stop whatever was causing bad iOS 8 battery life and reset things so the battery will last all day.
Hold the power button down until the screen changes, then slide to the right to power off. After a minute or two hold the power button to turn it back on.

Reset All Settings

When you check the iOS 8 battery usage in our first tip you may see usage and standby listed as the same. If this is the case you need to take more drastic measures because something is wrong with your iPhone. The first thing to try is Reset All Settings. This does not delete your data or wipe the phone, only the settings. If something is messed up this may fix horrible iOS 8 battery life in about 5 minutes.
Reset all settings to fix odd iOS 8 bugs that can cause bad battery life.
Go to Settings -> General -> Reset -> Reset All Settings. If prompted, enter your PIN or pass code. Wait for the device to restart and then use your device like normal. You may need to reconnect to WiFi, Bluetooth and change some other settings, but your apps, photos and accounts are still all there.

Restore the iOS 8 Update

If none of these iOS 8 battery life tips fix problems after your iOS 8 update you may need to backup the iPhone and restore from scratch. Perhaps something went wrong during your iOS 8 update, or there is just a bug from the upgrade, but this process will wipe it clean and install iOS 8 from scratch. This can solve a lot of problems.
You’ll need to back up the iPhone or iPad because this will delete all of your photos, apps and data from the device. You can restore from a backup, but there is a chance that will bring some problems back so the best bet is to set this up like a new iPhone.
  1. Plug in and backup to the computer or to iCloud
  2. Turn off Find My iPhone – Settings -> iCloud -> Find my iPhone -> Off
  3. in iTunes Click Restore
  4. Follow the prompts and the iPhone will reinstall iOS 8 from scratch.
  5. When it completes click Restore from Backup to put your information back on the iPhone or Choose to set up as a new iPhone.
This process takes 15 to 30 minutes depending on download times and if you need to backup or restore.
fix Bluetooth problems in iOS 8

  • Turn off Bluetooth and Reboot

The first thing to try is to turn off your Bluetooth and restart your iPhone or iPad:
  • Turn off Bluetooth from Control Center, or by going to Settings > Bluetooth and turning off the switch.
  • Reboot your iPhone by holding the Home button and the Power button until you see the Apple logo
  • Now enable Bluetooth again from Control Center or Settings > Bluetooth
  • Forget Device


  • Open Settings and go to Bluetooth.
  • Tap on the “i” icon against the device name you’re having problems connecting.
  • Tap on the “Forget This Device” button and confirm your action.
  • Now pair your iPhone or iPad with the device again, and see if the issue has been solved.
  • Reset Network Settings


  • Open Settings and navigate to General > Reset
  • Tap on Reset Network Settings
  • You’ll be required to enter your passcode, if you have one
  • Confirm your action in the popup


  • Restore and Setup as new iPhone


fix wifi problems with ios 8


Disable Wi-Fi Networking Services
Many users have reported that they’ve solved their issues by disabling Wi-Fi Networking under Settings > Privacy > Location Services > System Services. This only relates to your location being used for Wi-Fi Networking, so it doesn’t disable Wi-Fi entirely.

Reset Network Settings
Most networking related issues I’ve experienced have been fixed after resetting network settings. Resetting these settings flushes caches and clears DHCP settings and other networking related info. To reset network settings, open the Settings app and navigate to Settings > General > Reset and tap on Reset Network Settings.

Set Custom DNS
Often times, if your ISPs DNS servers are having problems, you can switch to Google DNS or OpenDNS. You can follow the instructions in the post linked below to change your DNS settings.


Restore and Setup as new iPhone
If none of these tips fix your issues, the last resort is to restore your iPhone or iPad via iTunes, and set it up as a new device. This way, you start afresh, and get rid of possibly problematic customisations and settings on your device. Follow the instructions in the post linked below to do a clean restore to the latest version of iOS via iTunes.

iOS 7.0.4 Released With A Fix For FaceTime Calls

Apple has just released iOS 7.0.4 for the iPhone, iPod Touch and iPad that comes with numerous bug fixes and stability improvements that includes a patch for when FaceTime calls would fail for some users.
The update is available over-the-air (OTA) by going into Settings > General > Software Update, or by connecting your device to your computer and launching iTunes.
iOS 7.0.4 Download
Apple also release iOS 6.1.5 for the fourth generation iPod Touch which brings about a fix for the FaceTime bug we just mentioned and an updated Apple TV firmware bringing it to version 6.0.2.
Of course the question on everyones mind is, is iOS 7.0.4 Jailbreak safe and so far the answer seems like it is a YES.

tutorial : iPhone Home Button Not Working? – How to Fix It?

iPhone home button not working? Well, don’t worry. Quite a lot of people have the very same problem. Something seems to go wrong and both the single and the double-click functionality of the home button seems to be totally lost. When this happens first, one is easily prompted to press harder. Sometimes people just thing it’s the hardware problem and that the home button is gone for good. This may not be the case most of the times.
The problem might occur because of two reasons – one, the software may be faulty and two – this is the worst case scenario – the hardware might be faulty. If it is the latter, you definitely need to go to the Apple Center and get a new iPhone. If the problem is with the software – which it mostly is – one needs to try out the following methods.
A problem with the software usually is set right when you do a restoration of the iPhone OS. You can either do a restore from the backup, or do a complete restore in case you have not much data to worry about. Restoring from the backup or from scratch lets you reconfigure all your software settings so that whatever it is that was bugging the home button on the iPhone would go away.
However, some people have reported that both the types of restore does not bring the intended results. In that case, you’ll need to follow some other method. Here’s one more method which seems to work in favor of some iPhones. You could try it too.
  1. Open any application on the iPhone
  2. Press and hold the Power button till the ‘Slide to Shutdown’ screen appears.
  3. Now release the Power button and gently hold the Home button.
  4. In all probability, your Home button would start functioning normally again!
In the case that it fails to do so even after all this, you’ll definitely need to check out the hardware part. If you have just recently bought the device, then you get a replacement warranty so you can make use of that to get a new device quickly.
Update
In case your iPhone home button has become less sensitive or is even broken, iOS 5 has come up with the great solution named ‘AssistiveTouch’ feature. Assistive Touch is one of the accessibility features in iOS 5 that can be served as a workaround, if your iPhone home button is broken.
How to Enable Assistive Touch to Access Home Button from Screen in iOS 5:
Got to Settings -> General -> Accessibility. Scroll down to bottom and tap on “AssistiveTouch” option. Set it ON to activate the option.

After setting AssistiveTouch to ON, you will see a transparent round button at the bottom right of the screen. Tap on that round button to bring the touch menu.

You will find the Home button option that works just like as the physical home button.

Hope, latest iOS 5 AssistiveTouch feature will bring the intended results.

fix iOS 5 Battery Drain Problem

Got some battery drain after upgrading to iOS 5? Want some help to improve your battery life on iOS 5? If so, this post will surely help you. We’ve received some tips and tricks to fix any battery drain you’re facing after iOS 5 upgrade.

iOS 5 Battery Drain Problem Fix

iOS 5 Battery Drain Fix

  • Reset Network Settings: Tap on “Settings” > Reset > Reset Network Settings
  • Disable Bluetooth: Settings > General > Bluetooth > “OFF”
  • Disable unwated Notifications & apps: Settings > Notifications > Turn OFF for anything you don’t need
  • Disable Location Service: Settings > Location Services > Disable selectively for services you don’t use
  • Disable Timezone Adjustment: Tap on “Settings” > “Location Services” > ‘System Services’ > Setting Time Zone to OFF
  • Disable Ping: Settings > General > Restrictions > Enable Restrictions > Ping > OFF
  • Disable Diagnostic & Usage Reports: Tap on “Settings” > General > About > Diagnostic & Usage > Don’t Send

One more tip:

Disable Email accounts by heading to Settings > Mail, Contacts, Calendars > Account Name > Delete Account. Once done, reset network settings (the first tip up there) then reboot your device and re-add your accounts back from Settings > Mail, Contacts, Calendars > Add Account.

Fix Error 3200 iOS 5 Updating In iTunes

Getting Error 3200 while upgrading to iOS 5? Need a fix for that? Well, Error 3200 is “an internal error occurred” that happens while upgrading to the newest software iOS 5. The error is as a result of the huge traffic on Apple’s servers. We have got a method sent to use in the tips box and we would like to share it.

Fix Error 3200 iOS 5

Fix Error 3200 While Updating To iOS 5

STEP 1: After downloading and installing iTunes 10.5. Run iTunes for 10 minutes then close it.
STEP 2: Navigate to the following folder:
  • Windows:  C:\Documents and Settings\”UserName”\Apple Computer\iTunes\iPhone Software Updates
  • Mac OS X: ~/Library/iTunes/iPhone Software Updates
STEP 3: Now cut and paste the files there to a folder on your desktop. (WARNING: Don’t delete them, just cut and paste) 
STEP 4: Put your iPhone into DFU Mode by following our guide 
STEP 5: Finally, open iTunes and go with iOS 5 restore procedure.
Let us know in case you got better solution.
UPDATE: We’ve heard that putting the device in DFU mode only is enough to fix the error.
UPDATE: Check the comments for some useful solutions and discussions.